注意:
- Mysql 5.7 +
本文档拿 Centos 8 , Mysql 8.0 做演示
更新系统
shell
# 更新过无需更新
yum -y update
安装 Mysql
shell
yum install -y @mysql
启动 Mysql
shell
systemctl start mysqld
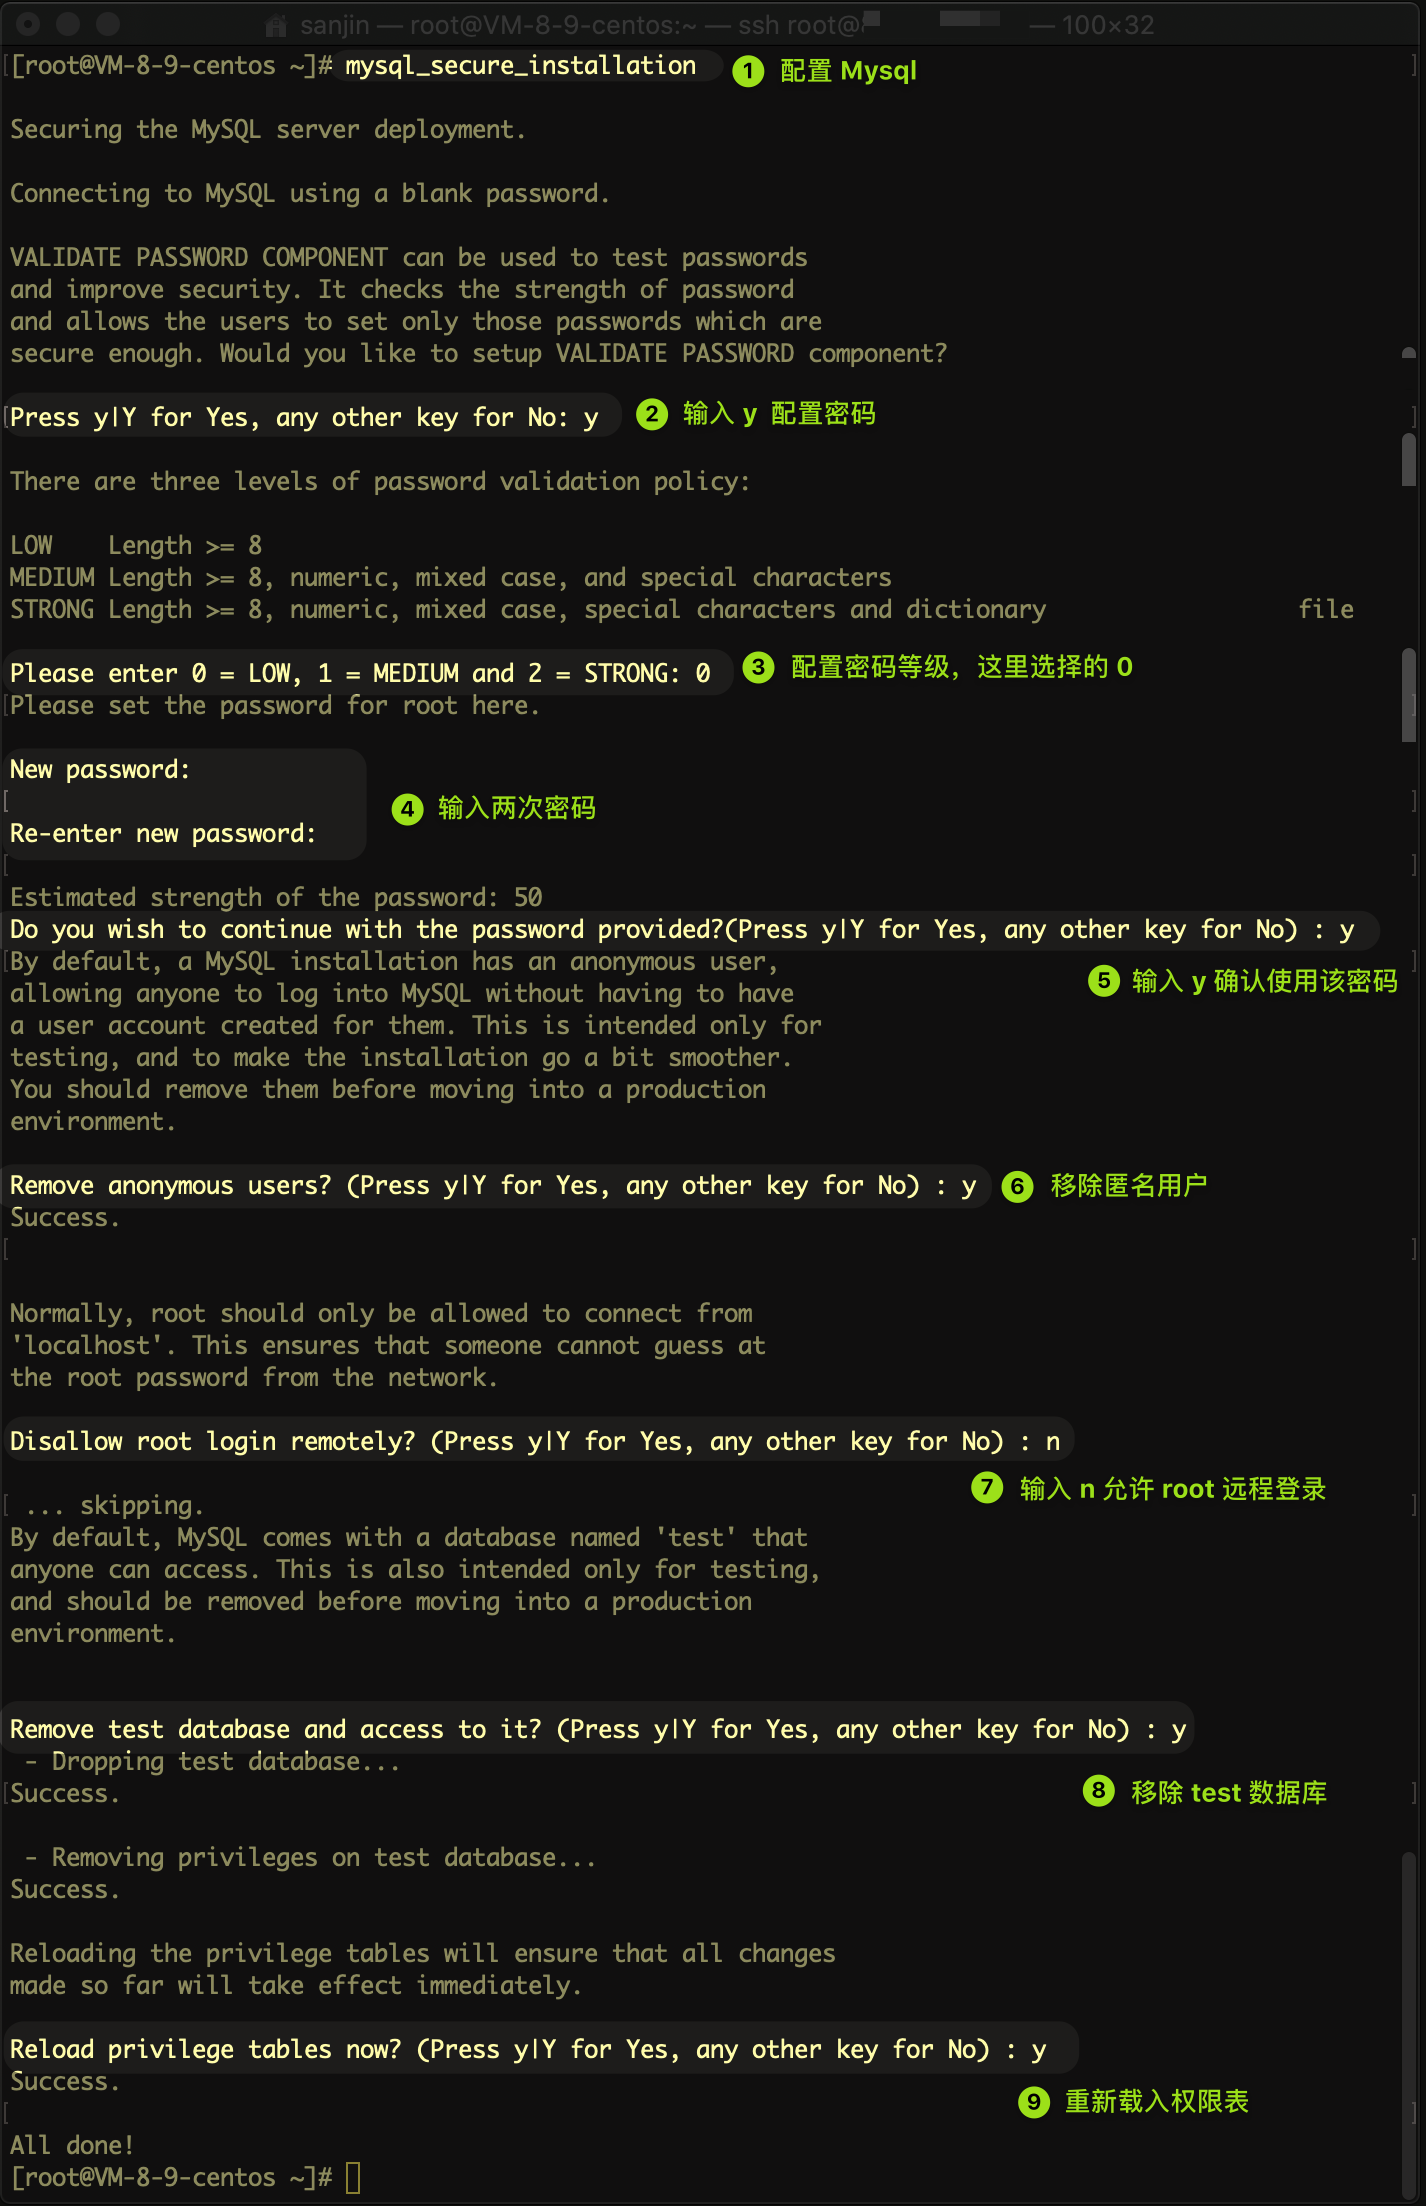
初始化 Mysql
shell
mysql_secure_installation
安装成功验证
shell
[root@VM-8-9-centos ~]# mysql -u root -p
Enter password:
Welcome to the MySQL monitor.  Commands end with ; or \g.
Your MySQL connection id is 16
Server version: 8.0.21 Source distribution

Copyright (c) 2000, 2020, Oracle and/or its affiliates. All rights reserved.

Oracle is a registered trademark of Oracle Corporation and/or its
affiliates. Other names may be trademarks of their respective
owners.

Type 'help;' or '\h' for help. Type '\c' to clear the current input statement.

mysql>
允许远程访问
shell
# 设置后方便远程管理数据库
use mysql;
update user set host='%' where user='root';
flush privileges;
防火墙放开
shell
firewall-cmd --add-port=3306/tcp --permanent
firewall-cmd --reload
命令行导入 本方法适合没有开启远程访问的用户
shell
# 建立数据库
mysql>create database w5_db;

# 使用数据库
mysql>use w5_db;

# 设置数据库编码
mysql>set names utf8mb4;

# 导入数据,SQL 语句在下面(注意sql文件的路径)
mysql>source /home/w5.sql;
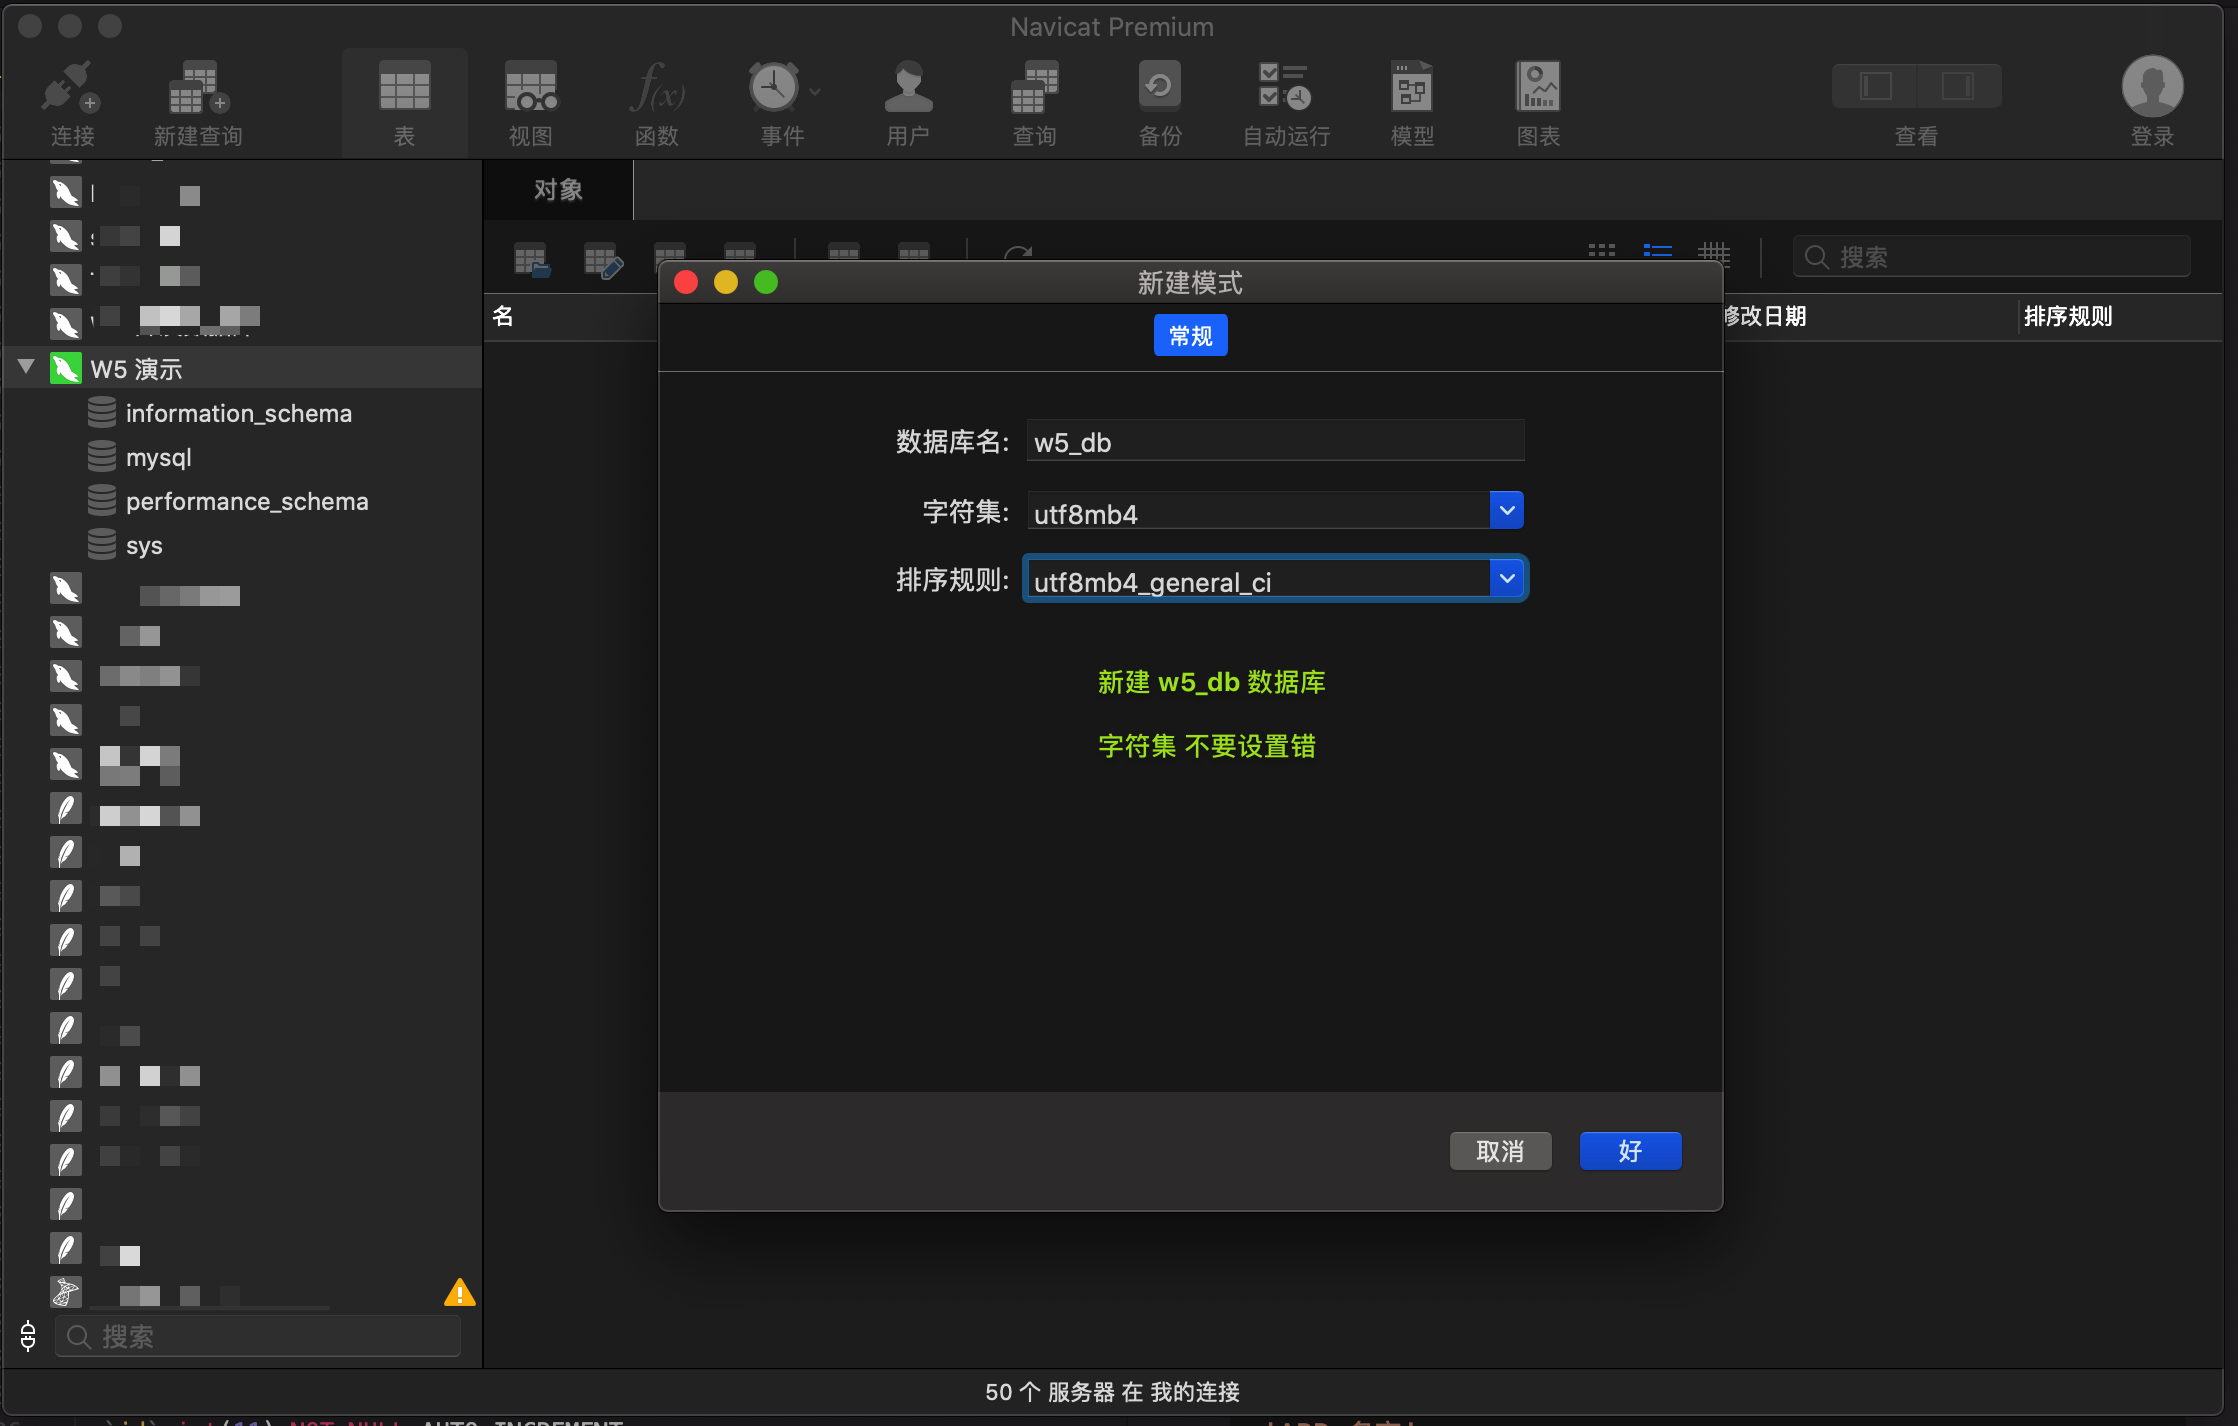
图形导入 本方法适合开启远程访问的用户
- 连接 Mysql
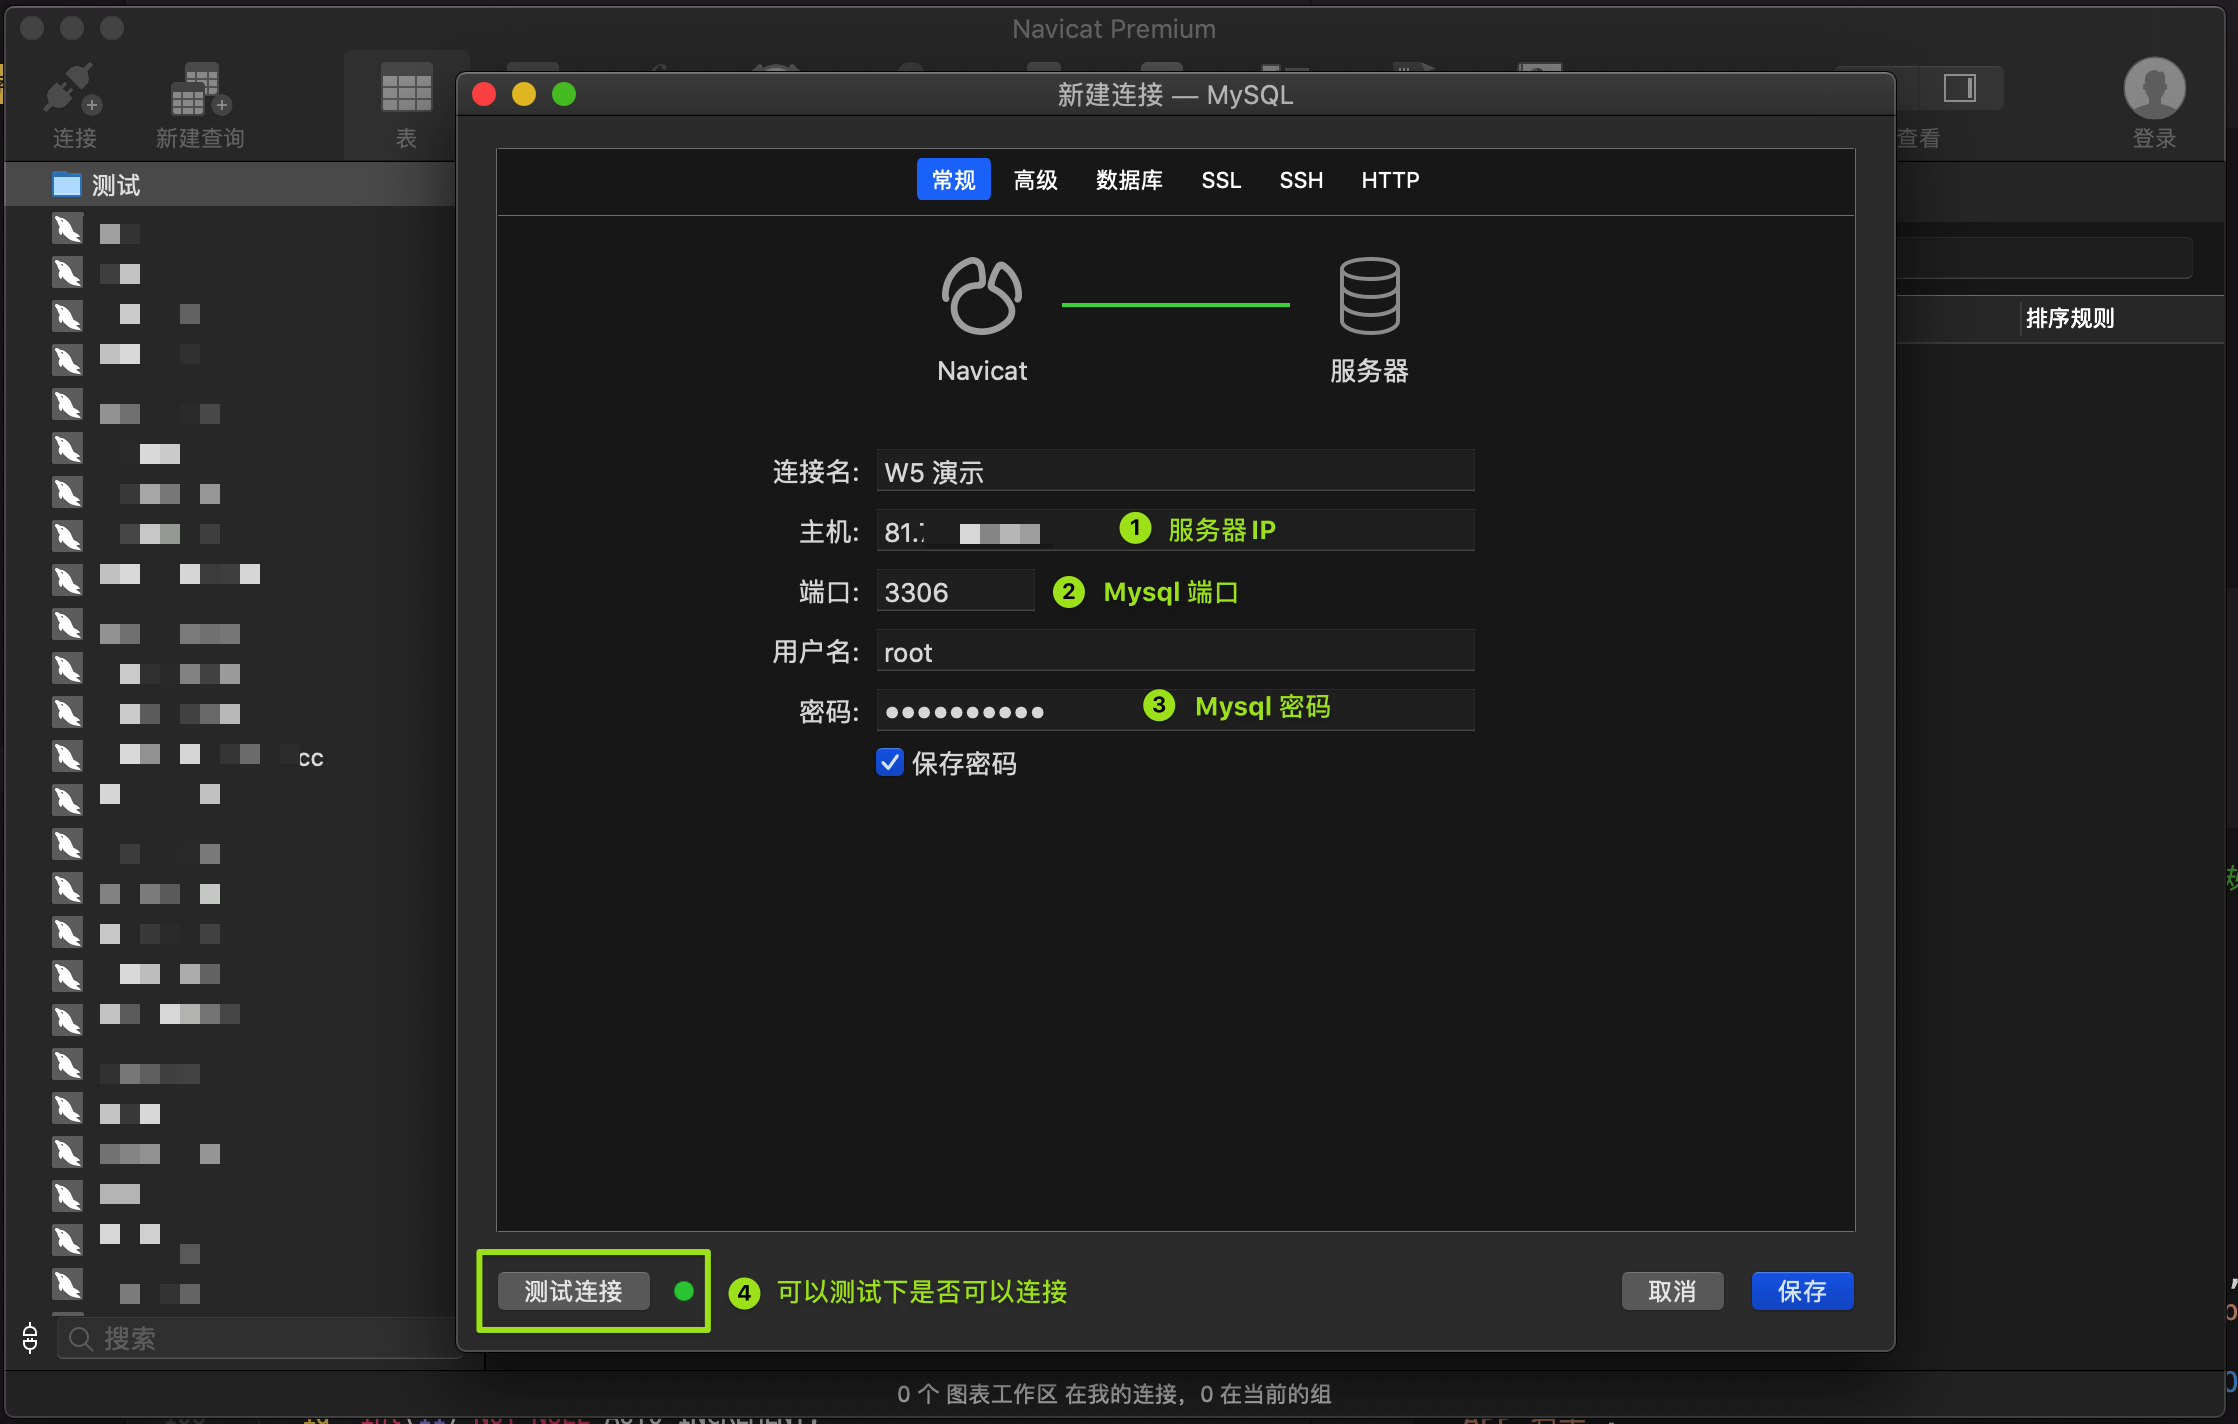
- 创建 DB
- 执行 SQL,SQL语句在下面 (也可以选择右键导入)
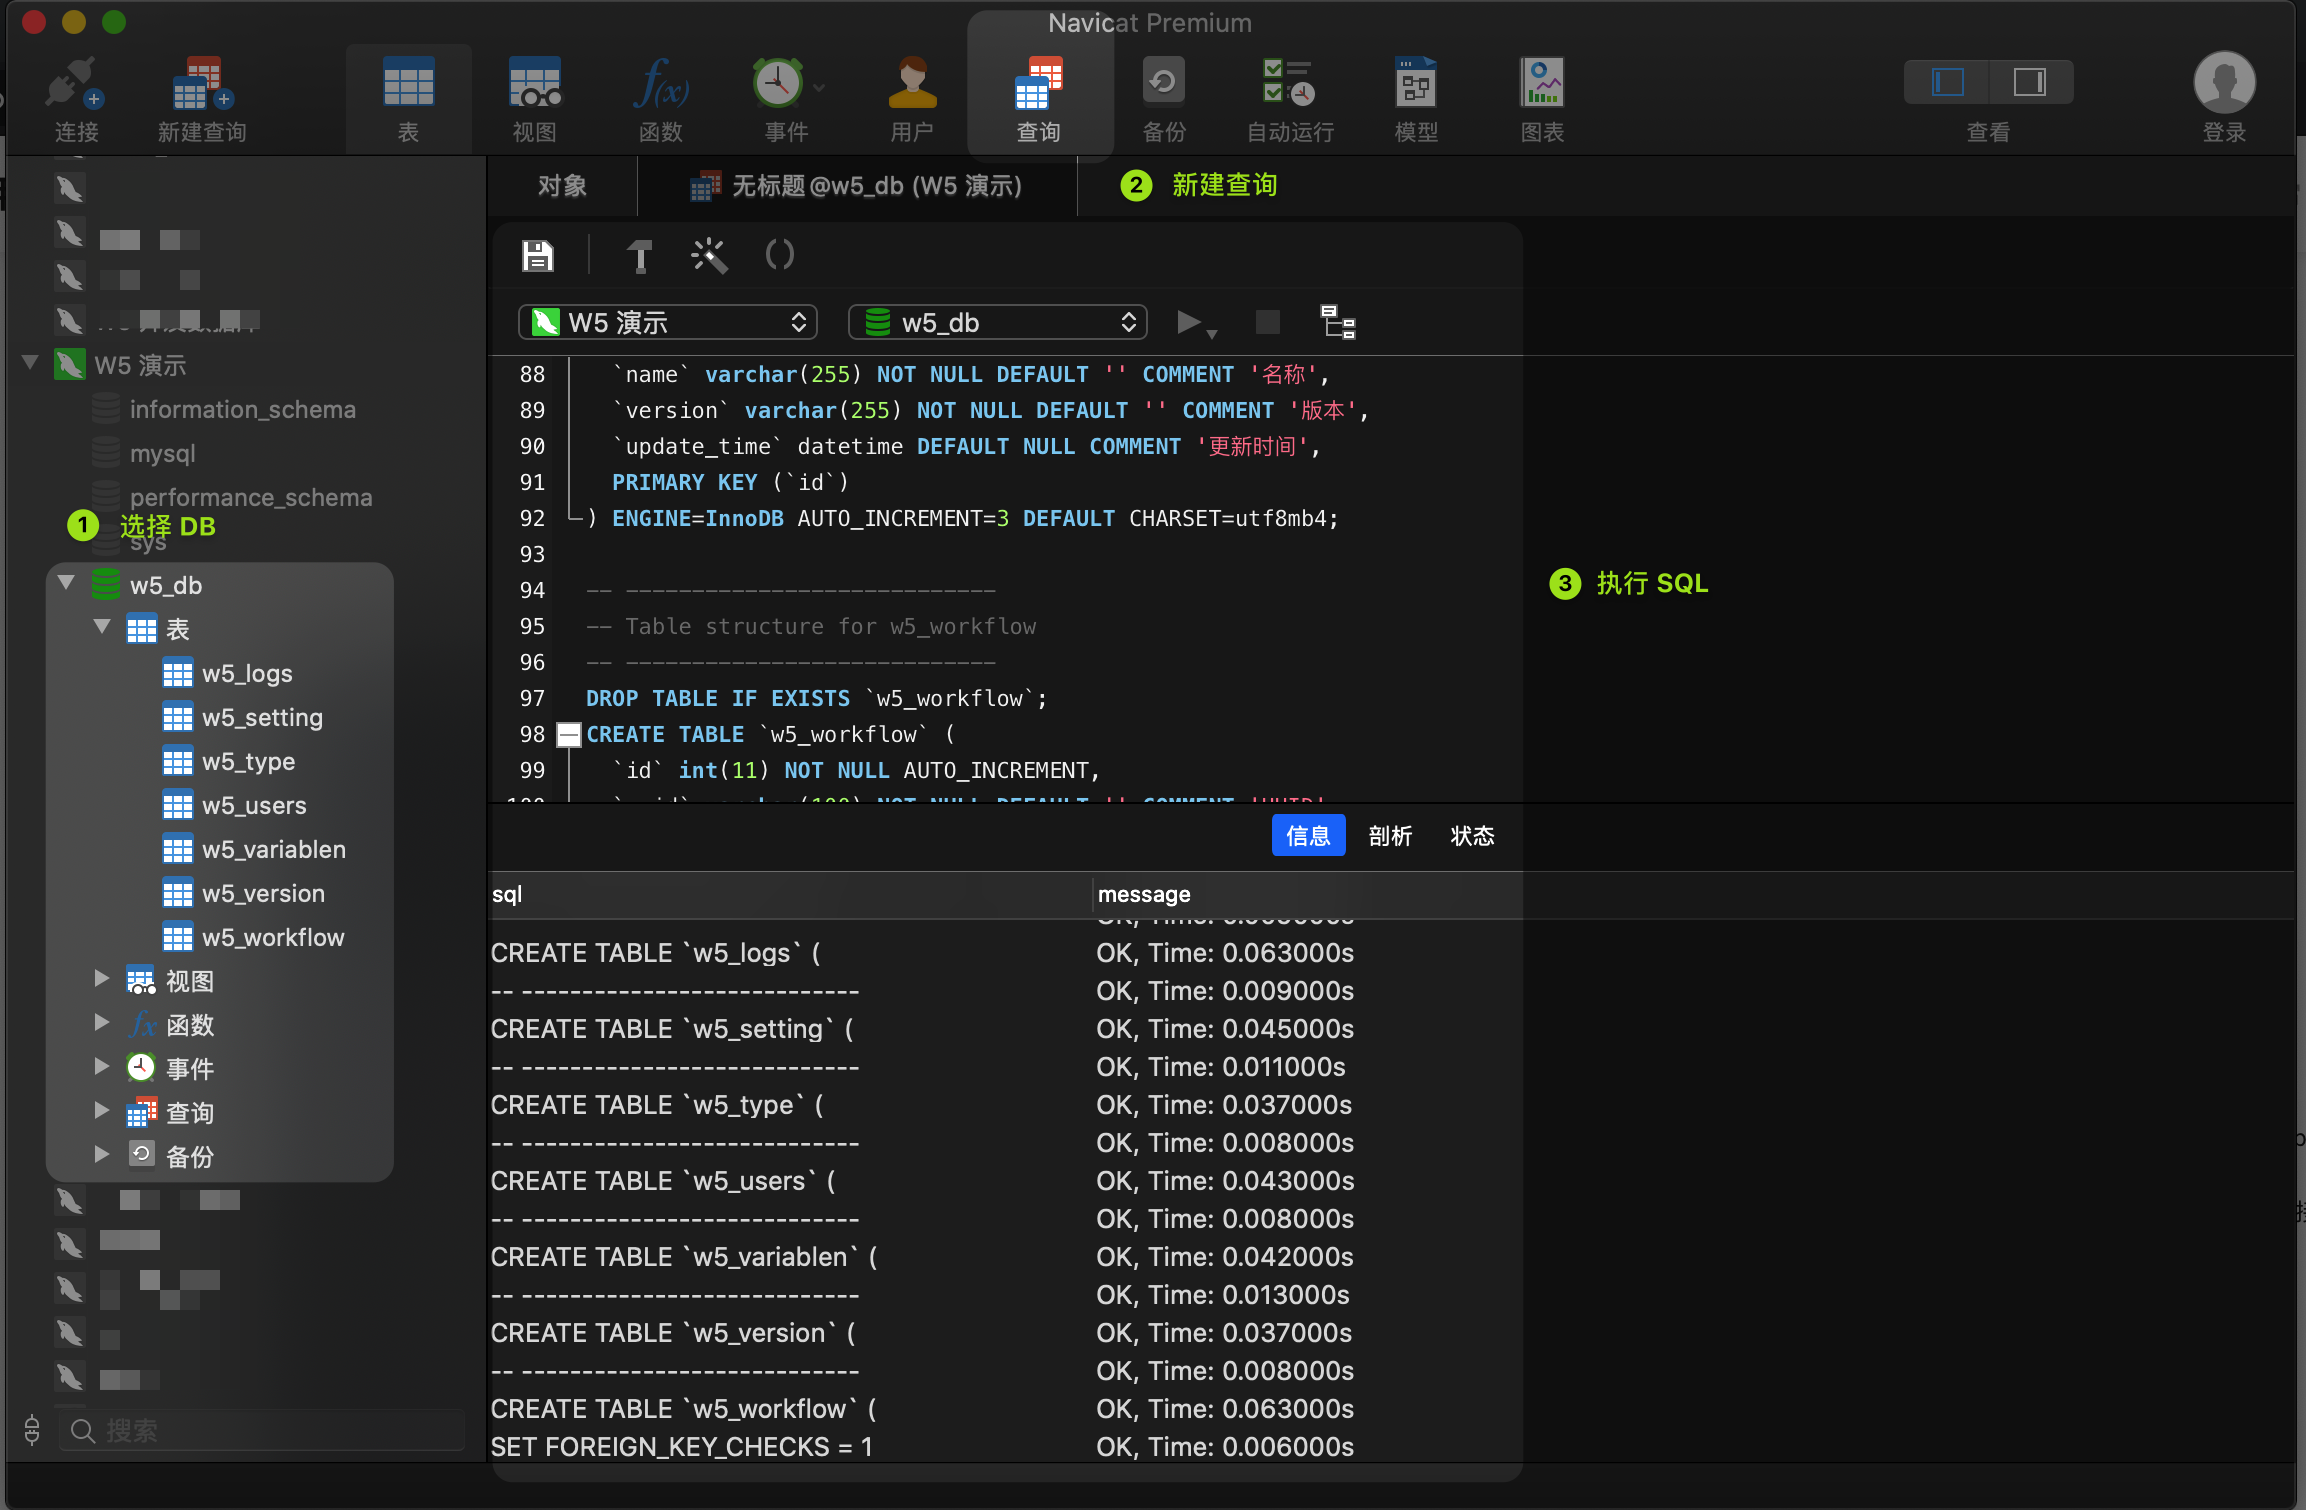
SQL 语句
W5 SQL : https://github.com/w5teams/w5/blob/main/docker/sql/w5.sql